I recently created a blogging website using Gatsby! This post will walk you through the entire process of creating a simple website using Gatsby and deploying it on Netlify.
We will be using the We will be using the minimal blog template.
1. Choosing a Template
- Login to Gatsby dashboard and click on "Add a site"

- Go for "Start from a Template" option.

- We will be using the minimal blog template.

- Give a name to your project:

- A github repository will be created on your behalf.

2. Cloning the Github repository
Now clone/download the Github repo just created, to your local system and open the code in your code editor.
You can use the following command for cloning -
git clone <github_url>
3. Installing packages
Run the following commands -
npm install
npm run develop
4. Customising the template
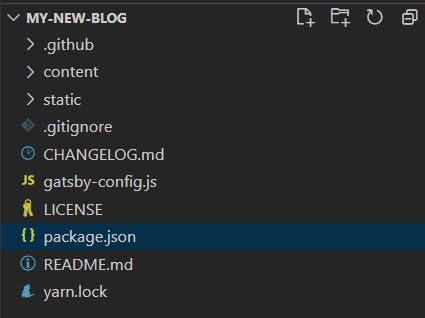
The directory structure:

Note: If anything breaks due to the following changes, run npm run develop before panicking :P.
a. Changing the Site name
For changing the site name, head over to gatsby-config.js and add the following code ( change it with the name you want for your blog )
siteMetadata: {
    siteTitleAlt: `Priyanka Yadav`,
    siteTitle: `Priyanka Yadav`,
  },
The code might break, just run npm run develop to build and run it again.
b. About Me Page
To change the content of About Me page,
- head over to
content/pages/about/index.mdx - write a new about me description.
---
title: About
slug: "/about"
---

Hi!

< About Me Description >
c. Changing Hero text
To change the hero text on the index page,
- create a new file at
src\@lekoarts\gatsby-theme-minimal-blog\texts\hero.mdx - This file shadows the default hero text.
<Text sx={{ fontSize: [4, 5, 6], fontWeight: `bold`, color: `heading` }}>
  Hi.
</Text>

I am Priyanka....................................
You might have to run npm run develop to see the changes.
d. Social Media Links
You can add, edit and modify your Social Media details from gatsby-config.js.
externalLinks: [
          {
            name: `Twitter`,
            url: `https://twitter.com/<username>`,
          },
          {
            name: `LinkedIn`,
            url: `https://www.linkedin.com/in/<username>/`,
          },
          {
            name: `Github`,
            url: `https://github.com/<username>`,
          },
        ],
e. Adding a new blog page
From the documentation
New blog posts will be shown on the index page (the three most recent ones) of this theme and on the blog overview page. They can be added by creating MDX files inside content/posts. General setup:
- Create a new folder inside
content/posts - Create a new
index.mdxfile, and add the frontmatter - Add images to the created folder (from step 1) you want to reference in your blog post.
- Reference an image as your
bannerin the frontmatter - Write your content below the frontmatter
- Add a slug to the frontmatter to use a custom slug, e.g. slug: "/my-slug" (Optional)
- You can also add
tagsto your blog.
Frontmatter reference:
title: Introduction to "Defence against the Dark Arts"
date: 2019-11-07
description: Defence Against the Dark Arts (abbreviated as DADA) is a subject taught at Hogwarts School of Witchcraft and Wizardry and Ilvermorny School of Witchcraft and Wizardry.
tags:
  - Tutorial
  - Dark Arts
banner: ./defence-against-the-dark-arts.jpg
canonicalUrl: https://random-blog-about-curses.com/curses-counter-curses-and-more
You can refer to this blog folder to get an idea.
f. Removing projects page
To edit the projects part below “Latest posts” on the index page, create a file at src/@lekoarts/gatsby-theme-minimal-blog/texts/bottom.mdx to edit the contents.
Since I do not want the Projects section, I created this file and left it empty.
g. Removing the dummy blogs
Now, to remove the dummy blogs in the website, just delete the corresponding folders from content/posts.
h. Favicons
Generate favicons and banner for your site using favicon generator and canva.
Place the newly generated favicons and banner under
staticfolder .And make the following changes in
gatsby-config.js
resolve: `gatsby-plugin-manifest`,
      options: {
        name: `Priyanka's Blog`,
        short_name: `Priyanka's Blog`,
        description: `Priyanka Yadav's blog`,
        start_url: `/`,
        background_color: `#fff`,
        display: `standalone`,
        icon: `./static/favicon-16x16.png`,
        theme_color_in_head: false,
      },
    },
Now run npm run develop to ensure nothing breaks and your website is working fine.
5. Commit the changes to Github
Now you can commit all the changes to Github. Use the following commands -
git status
git add .
git commit -m "<commit_message>"
// optional : git checkout -b <branch_name>
git push origin <branch_name>
6. Deploying on Netlify
Head over to Netlify and Login.
Click on the option "New Site from Git"

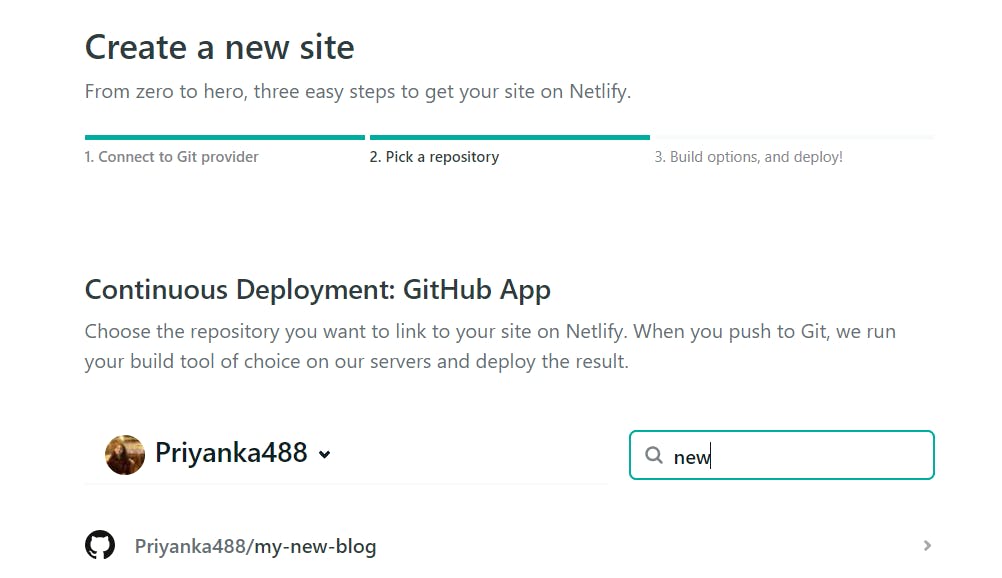
- Choose "Github" for continuous deployment.

- Find your repository and select it

- Select your branch name

- Enter the build command and go ahead.

It will take sometime for the site to build and get deployed.
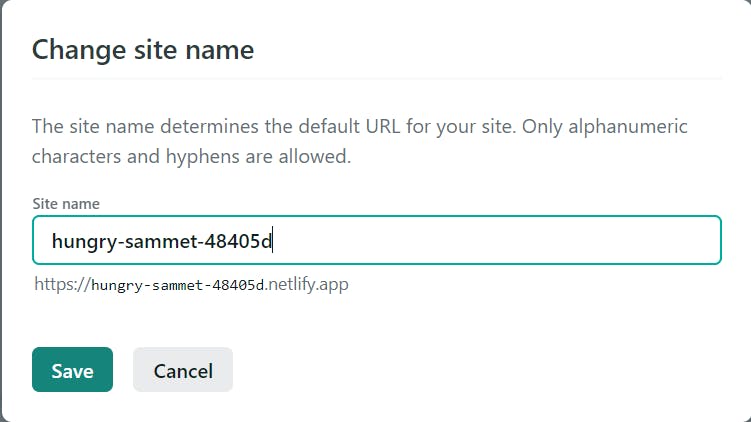
After the site is deployed, you can change the site name from "Domain Settings" option.


And there you are, you have successfully created your blog and even deployed it 🥳. Feel free to put your queries in the comments! :)
